
Setting Up a Network “Drop Box” Folder
The following steps detail how to activate the network Drop Box for the current user in OS X.
Step 1: Setup File Sharing
The first step is to turn on personal file sharing in the Sharing pane of the System Preferences application. Click here to open the File Sharing preference pane on your computer. The Sharing preference pane contains all of the controls related to sharing access to your computer. (⬇ see below )
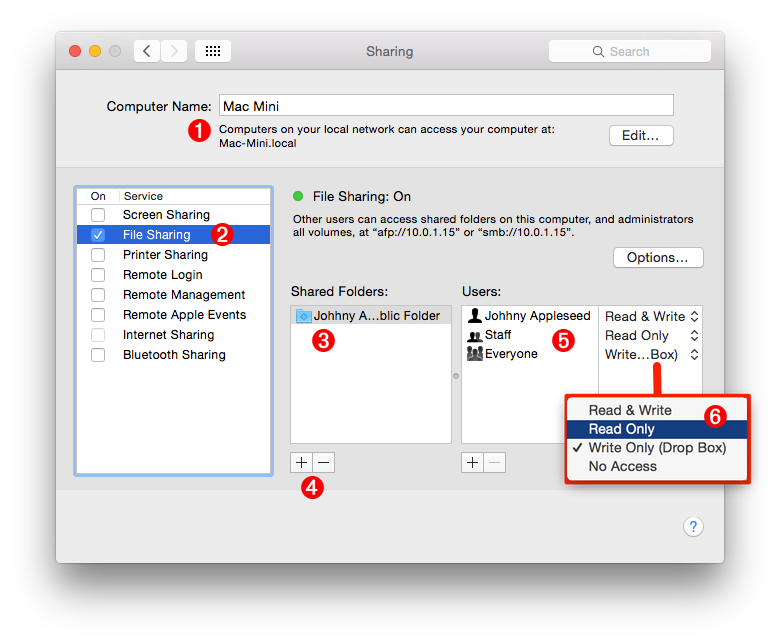
The text entered in the “Computer Name” field 1 will appear in the Sharing section of the Finder sidebar on any computers connected to the same local network as your computer.
DO THIS ►Select the checkbox to the left of the “File Sharing” option 2 in the sharing services list to activate file sharing for your computer. Once activated, a green status light will display next to the network address information.
Bt default, your “Public” folder should be listed in the “Shared Folders” list 3 . If it is not in the list, click the “Add” button 4 and in the forthcoming sheet, navigate to and select the “Public” folder located in your “Home” directory.
The default set of “Users” 5 for your shared “Public” folder are: you, Staff, and Everyone. Set the permissions settings for the Everyone user 6 to “Read Only” which will allow all users to read documents placed in the “Public” folder, and to be able to add items to the “Drop Box” folder within.
File Sharing is now active on your computer. The next step is to crete user accounts for those who will be adding items to the shared “Drop Box” folder.
Step 2: Granting Access to the Drop Box
In order for users to access your Drop Box on the network, you must either: add individual users to the User & Groups system preference pane, or grant limited access for all network users. Click here to open the Users & Groups preference pane on your computer.
To add a new sharing user to the approved list of users, click the “Add” button at the bottom left of the User & Groups preferences window 1 (⬇ see below )
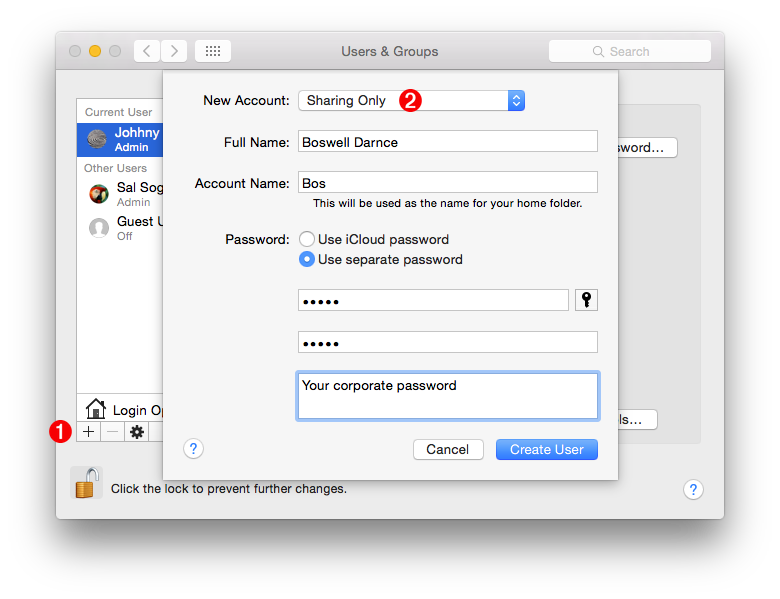
In the forthcoming sheet, select Sharing Only from the user types popup menu 2 (⬆ see above ) and fill-in the information for the user to add.
If instead of granting individual users access by adding to the list of approved users with access to your shared folders, you can choose to grant everyone on the local network limited file sharing access to your “Public” folder and the “Drop Box” folder within it.
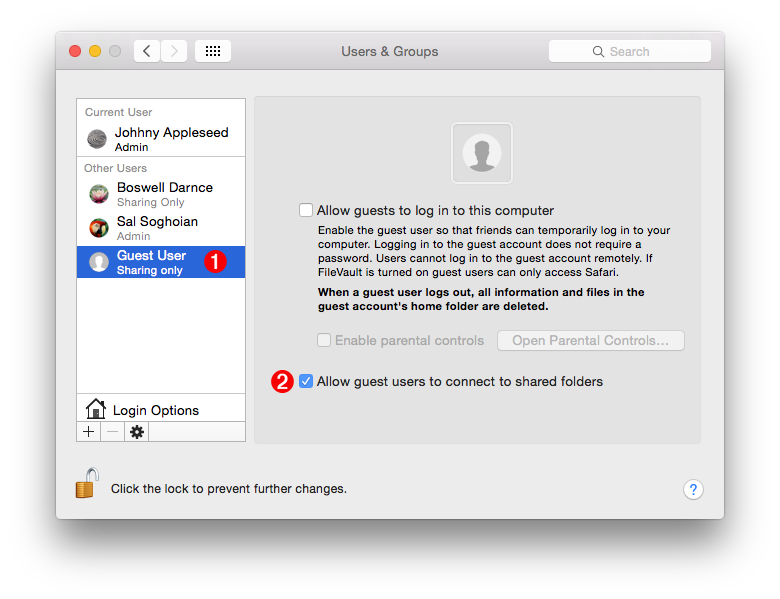
In the Users & Groups preference pane, select the “Guest User” account 1 (⬇ see below ) and select the checkbox on the right side labeled “Allow guest users to connect to shared folders” 2
Connecting to a Network Shared Folder
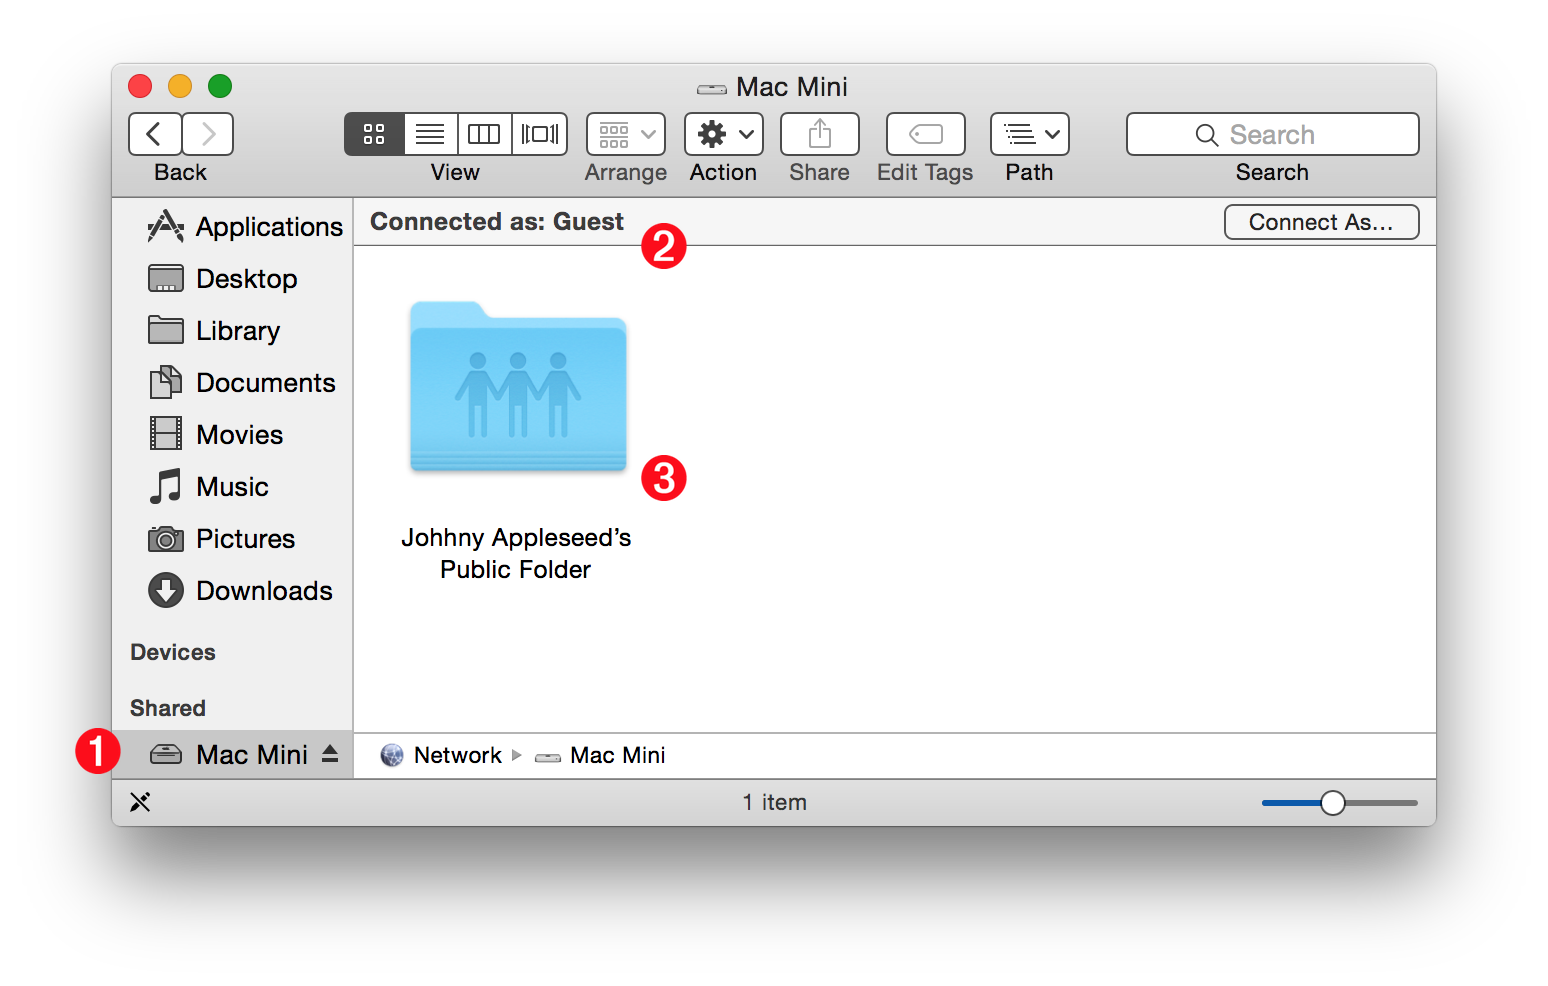
To connect as a guest user to a shared folder on your network, select the name of the shared computer in the sidebar of a Finder window 1 (⬇ see below ) . When the connection has completed, its status will be displayed 2 and the Public folder 3 will appear in the window.
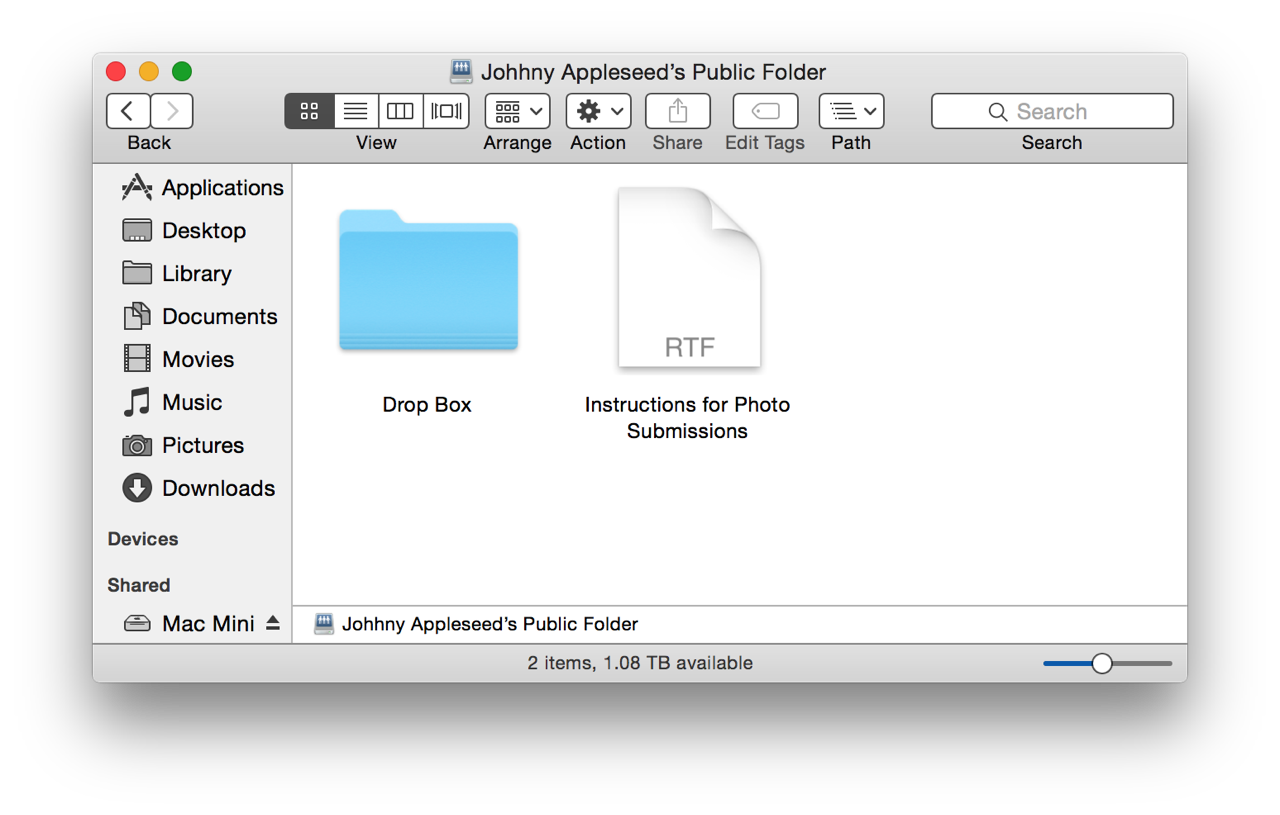
Open the “Public” folder (⬆ see above ) and its contents, including the “Drop Box” folder, will be displayed (⬇ see below )
Drag items from your computer onto the “Drop Box” folder icon, and the following dialog will appear (⬇ see below )
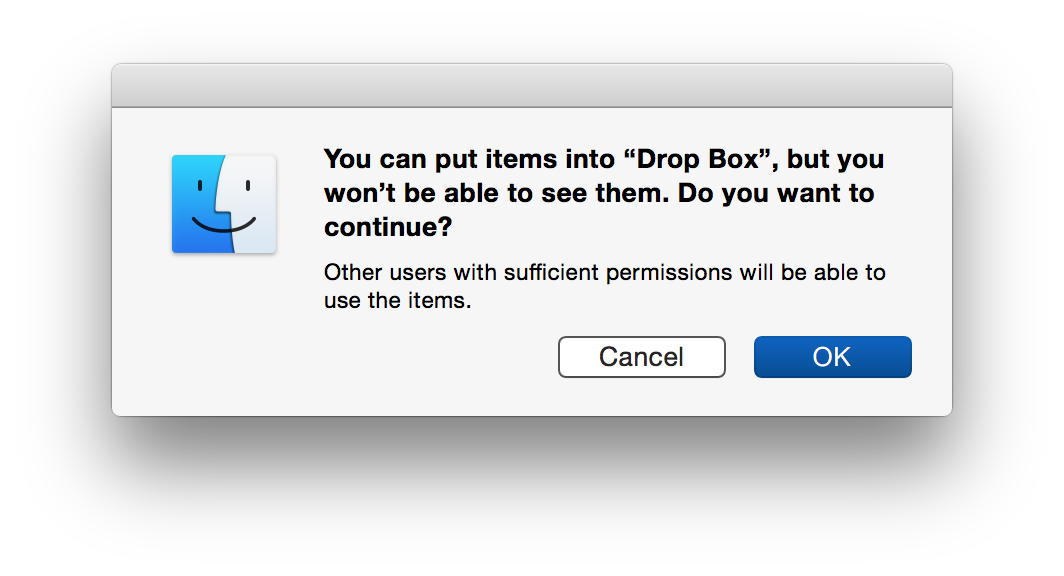
Click the dialog’s OK button to begin the transfer of the dragged-on items to the network shared folder.